

Installing OPNsense on Proxmox#
This is a personal documentation and guide to install OPNsense firewall on Proxmox and is a part of a series of guides for my personal Proxmox Lab build.
Installation#
Before starting I also created a linux bridge vmbr1 with VLAN aware checked and attached my secondary nicmb interface to it.

You can get the iso from here. I downloaded iso directly using the Proxmox GUI.
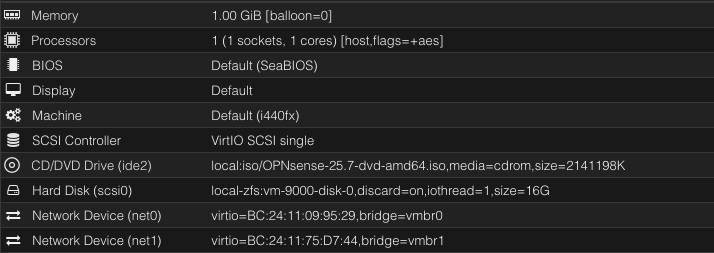
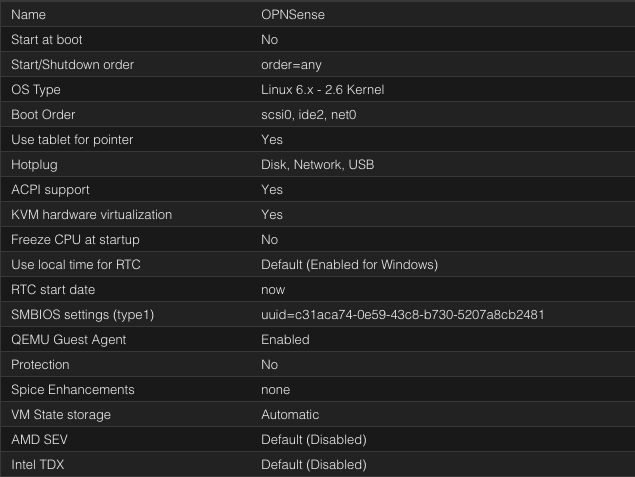
I created the VM with the following hardware and options and then attached the secondary interface before starting. The resources aren’t much because it won’t be doing any heavy tasks. I might change it in the future if required.
Note:
Proxmox will report RAM usage as max no matter how much memory you set. This is because OPNsense is FreeBSD-based, and FreeBSD memory accounting is very different from Linux
Remember to disable firewall in each of the Network Devices
I also enabled aes support and enabled Writeback because I’m on an SSD
Once created we can start the VM and run through the installer. The installer credentials are:
Username: installer , Password: opnsense
Here are the options I chose during install:
- Default Keymap
- Install UFS (because I’m already installing on a ZFS pool. There is no need for double ZFS)
Here it gave me warning saying live install would take at least 3000 mib but I chose to proceed anyway.
- I selected
da0as thats the install disk
I did run into a bottleneck of ram which was expected so I recommend having 2-4 GB or ram at least for the install process and you can reduce it down later.
- Change the root password and then finally reboot
Configuration & Temporary WAN Access#
To configure OPNSense we need to either connect a machine to the LAN or access it from the WAN. By default WAN connections are blocked. I didn’t have a machine setup yet so I chose to disable the firewall temporarily:
Choose Option 8 for shell and login. After logging in run the following command:
pfctl -dWhat this does:
- Disables the firewall temporarily
- Immediately allows access from WAN
- Resets on reboot (safe)
After disabling firewall we can prepare our WAN interface and Firewall rules to allow external management.
At this point I also recommend assigning a static IPv4 to the WAN interface. In my case 10.27.27.200
Go through the setup wizard first and then change settings manually.
1. Verify Interface Assignment#
From OPNsense console, select Option 1: Assign Interfaces
Ensure correct mapping with MAC addresses for verification:
WAN → Interface connected to Proxmox management network (e.g., vtnet0 with 10.27.27.200)
LAN → Interface for internal network (e.g., vtnet1 with 10.200.1.1)
If different, change it in the GUI’s Interface Assignment section.
2. Disable Private Network Blocking on WAN & Gateway Settings#
Access OPNsense web GUI and navigate to:
Interfaces → WAN
- ☐ Uncheck “Block private networks”
- ☐ Uncheck “Block bogon networks”
- Click Save and Apply Changes
Ensure your Static IPv4 Connection Settings are correct and that you have Gateway assigned.
3. Create Firewall Rule for Management Access#
Navigate to Firewall → Rules → WAN
Configure the rule:
- Action: Pass
- Quick: ☑ Checked
- Interface: WAN
- Direction: in
- TCP/IP Version: IPv4
- Protocol: TCP
- Source: 10.27.27.0/24
- Source Port: any
- Destination: WAN address (10.27.27.200) or This Firewall
- Destination Port: 443 (HTTPS)
Click Save and Apply Changes

4. Optional: Additional Management Protocols#
Repeat step 3 for SSH access if needed:
- Destination Port: 22 (SSH)
That should be OPNsense configured and ready to go
DHCP Configuration#
It is available under Services -> Dnsmasq DNS & DHCP
Under the General Tab, ensure that you explicitly define the interfaces that you want to enable DHCP for:

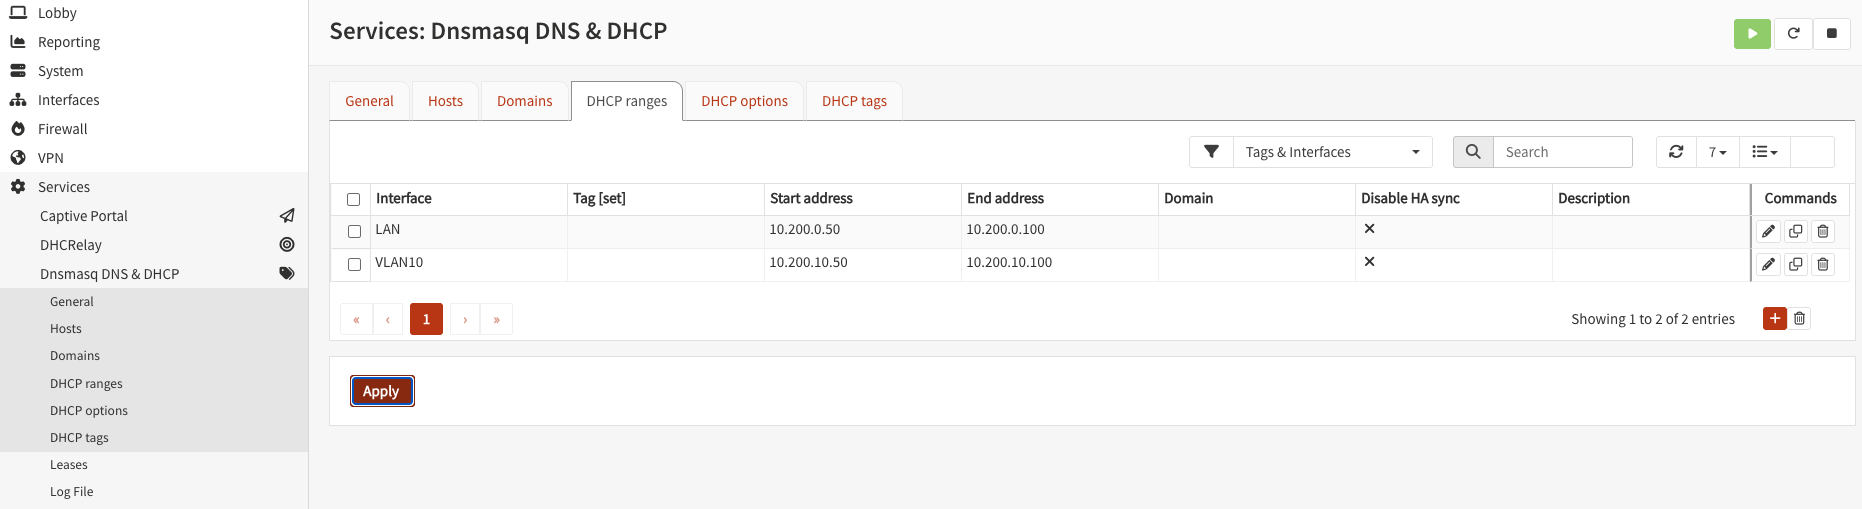
Under DHCP ranges you can configure the DHCP range:

VLANs and Firewall Rules#
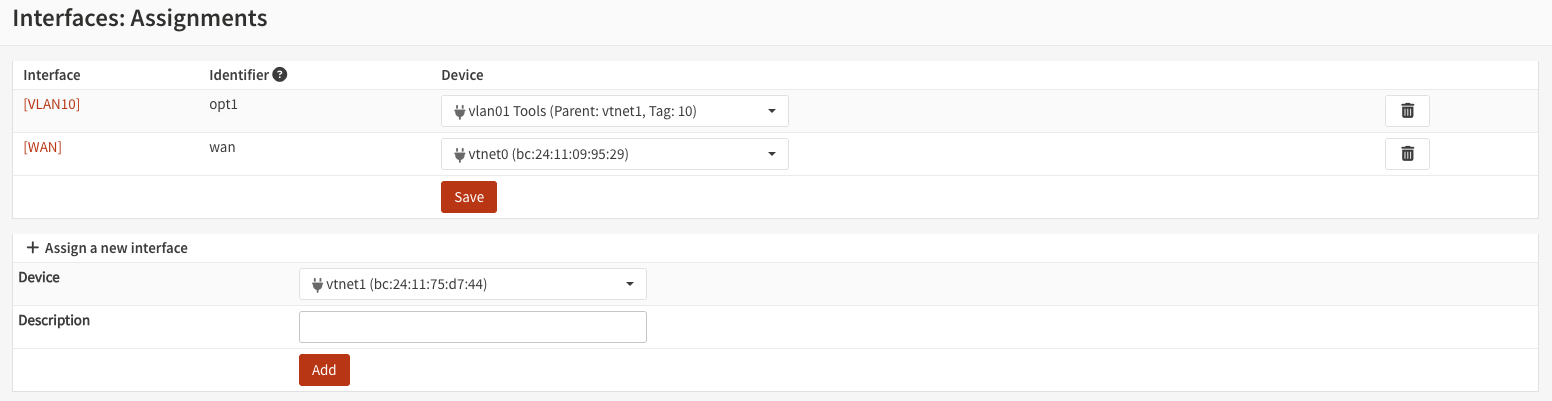
To add a VLAN, first add a VLAN interface:
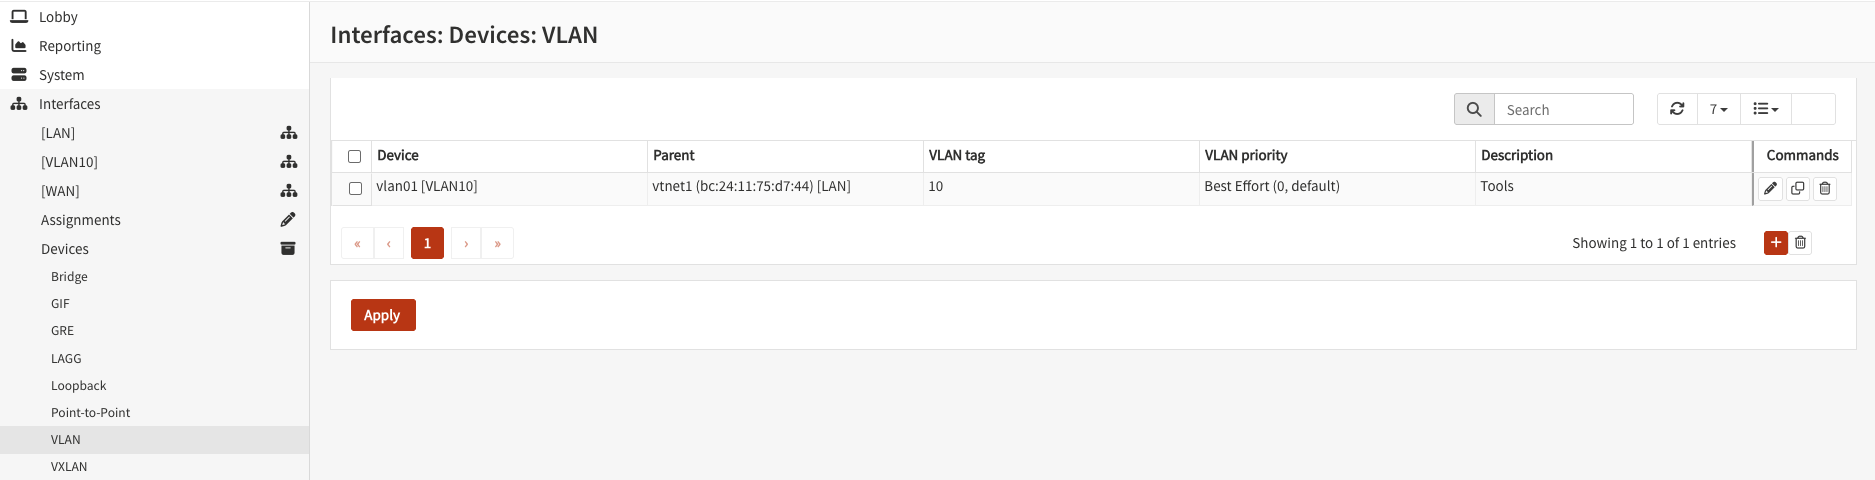
Then, add the VLAN you just configured as an Interface:
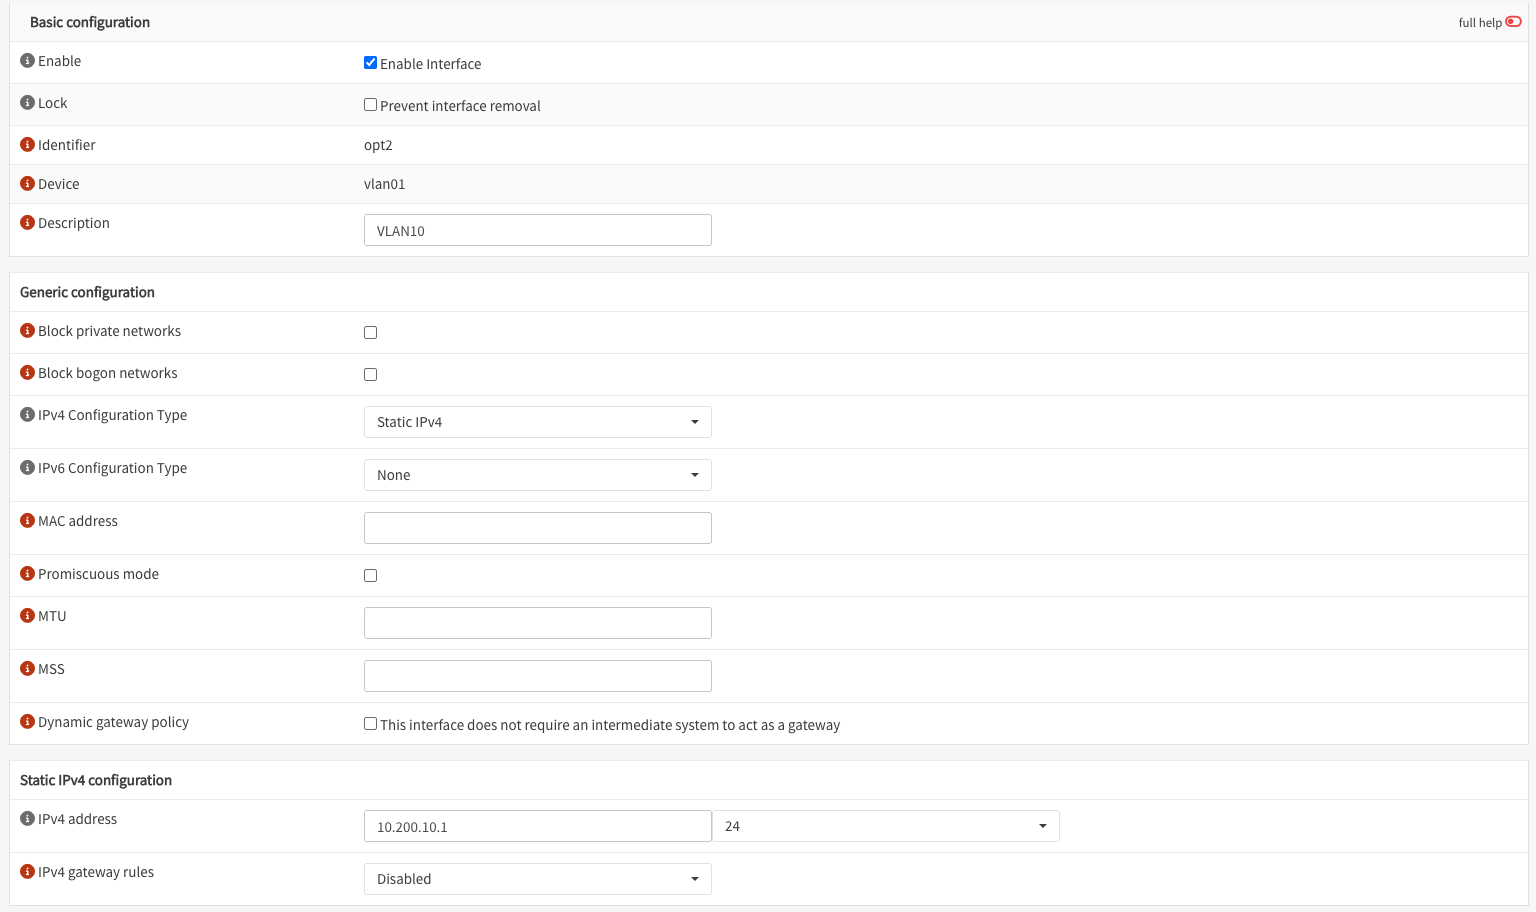
Once added, select the VLAN interface and configure it accordingly:
DHCP can be configured in the Services section:
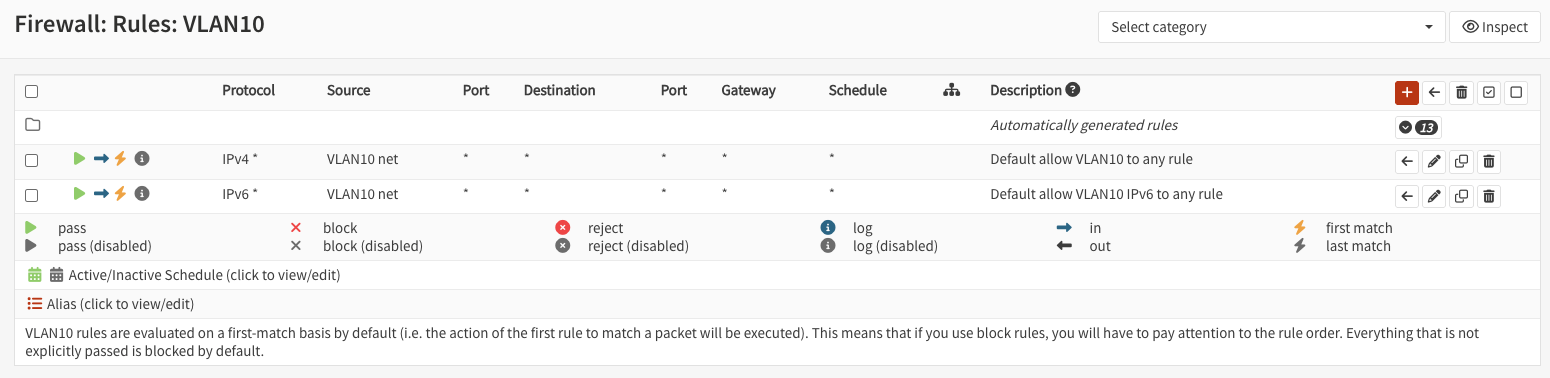
Configure a basic rule to ensure the VLAN works:
I suggest copying the default rules from LAN interface and then applying it to the VLAN interface.
For VLAN DHCP Configuration refer to the DHCP Configuration Section. The steps are the same.
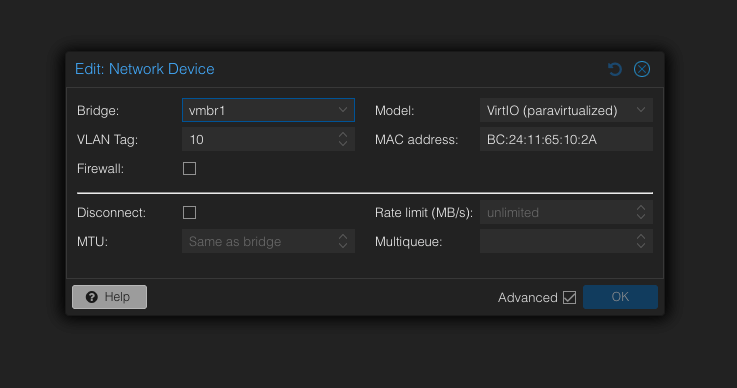
VLAN Tags in Proxmox#
To use your configured VLAN ensure VLAN tagging is enabled for the interface and assign the VLAN tag.
Updating Firmware#
- You can update the firmware under
System -> Firmware - After you’ve setup your firewall it is important to keep it up to date.
Extras#
- You can change the DNS servers and the theme to dark under
System -> Settings -> General
