

Installing Wazuh on Proxmox#
This is a personal documentation and guide to install Wazuh on Proxmox and is a part of a series of guides for my personal Proxmox Lab build.
I decided to install Wazuh on a container to be resource friendly. If you are going to have it on strict isolated lab then obviously it is better to install it on a VM for the kernel level isolation.
OPNsense Prep and Architecture#
In order to manage and isolate Wazuh better, I’ll be creating a seperate VLAN for tools (VLAN 100) and adding the container to this VLAN.
Here are the required ports mentioned in the architecture of Wazuh documentation:
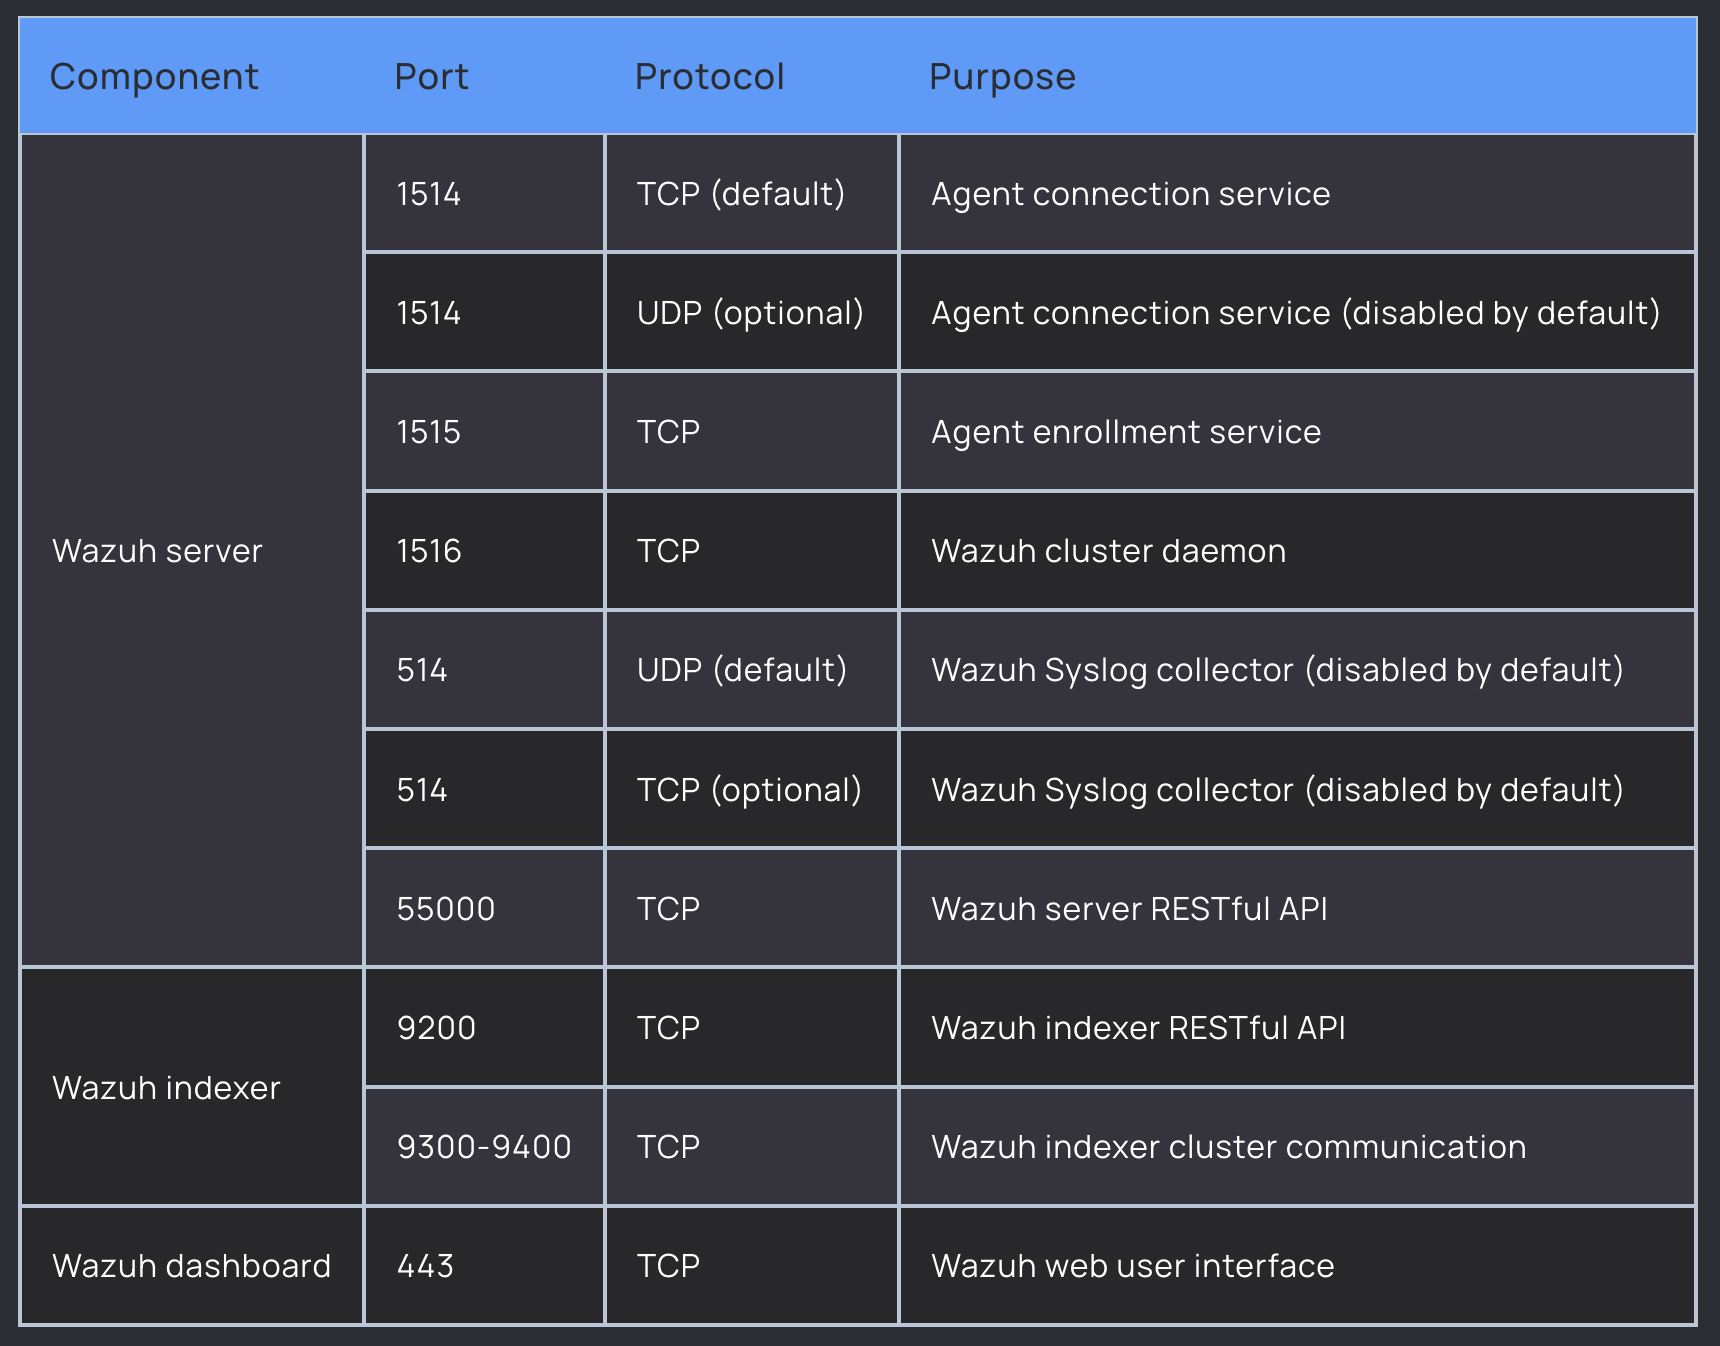
Ports 9200, 9300-9400 - Internal between Wazuh components (indexer), not exposed externally. These stay inside the VM.
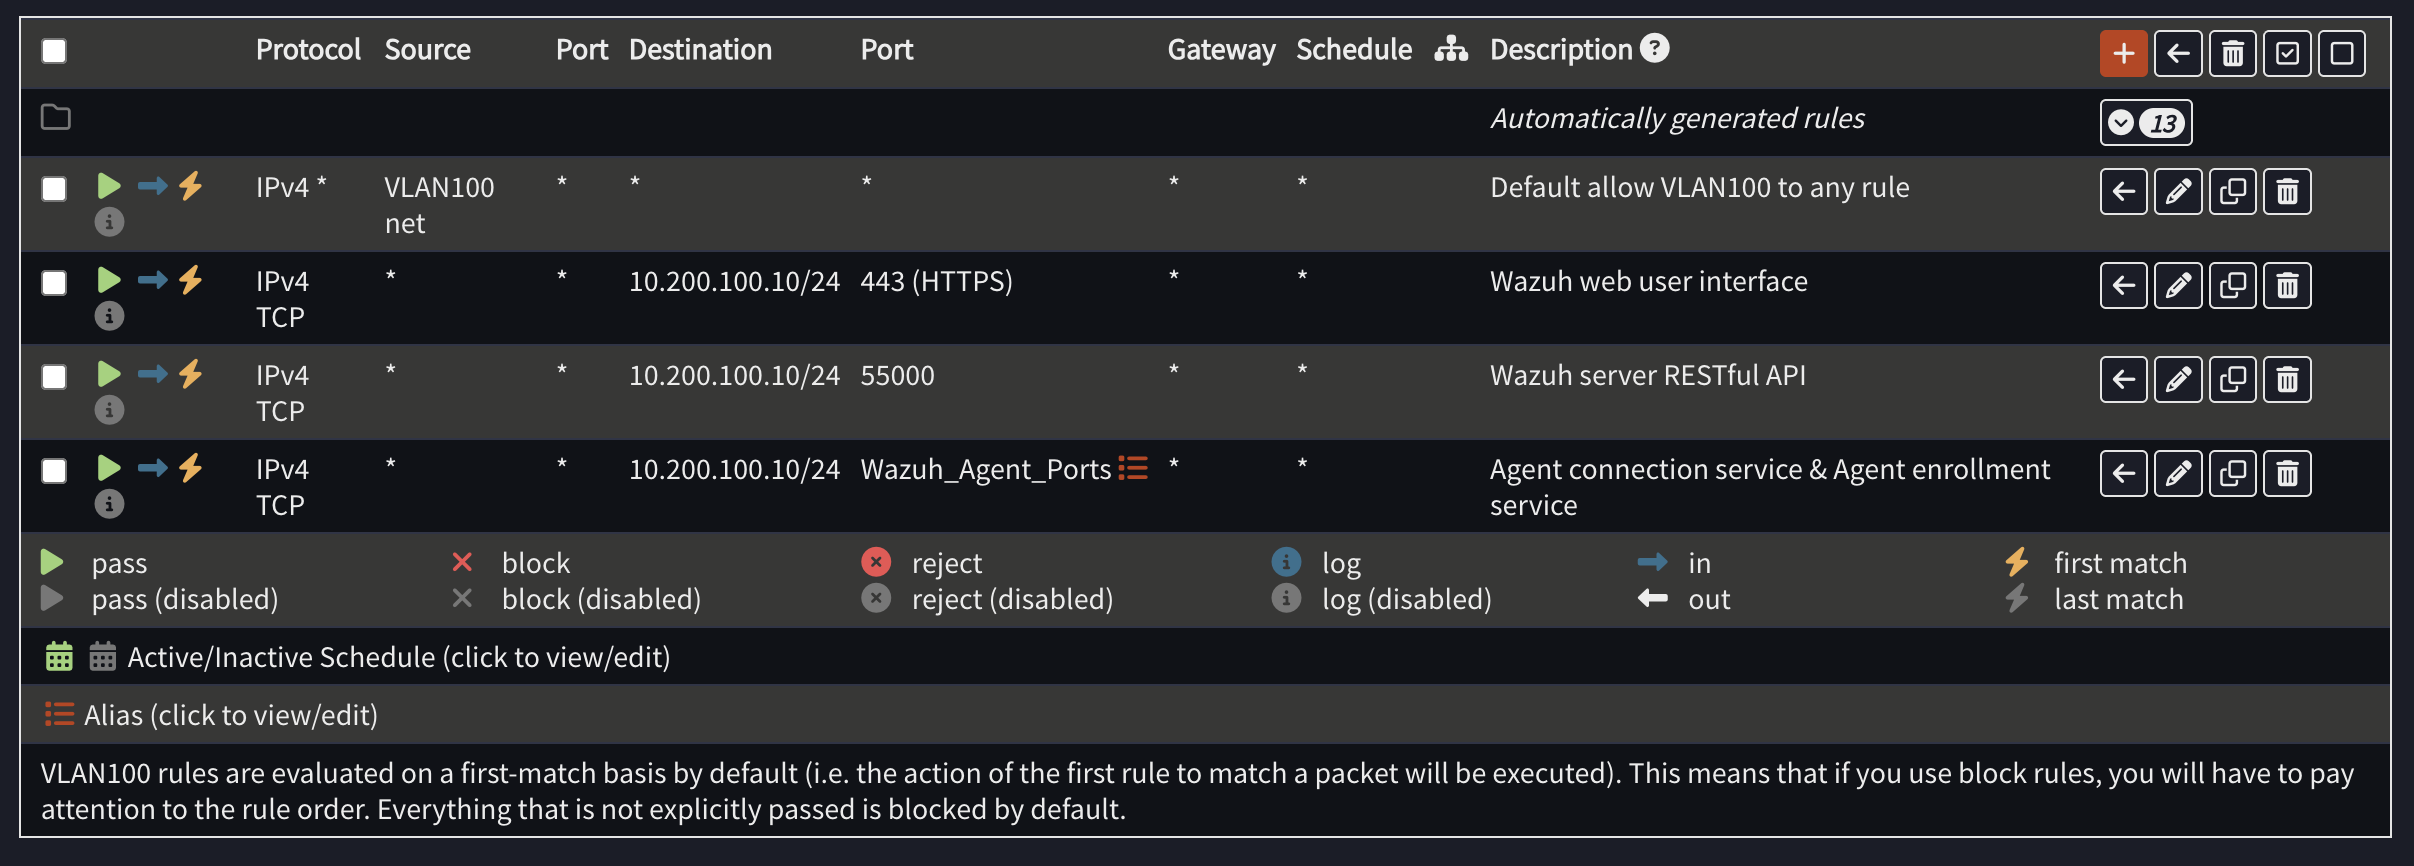
This will be the configuration I’ll be setting up in OPNsense:
Aliases#
Firewall → Aliases1
- Name:
Wazuh_Agent_Ports - Ports: 1514, 1515
Inbound Rules (To VLAN100)#
- Allow Agent Traffic
- Action: Pass | Protocol: TCP | Source: any | Dest: VLAN100 net | Dest Port: 1514, 1515
- Allow Web UI Access
- Action: Pass | Protocol: TCP | Source: any | Dest: VLAN100 net | Dest Port: 443
- Allow API (Optional)
- Action: Pass | Protocol: TCP | Source: any | Dest: VLAN100 net | Dest Port: 55000
Outbound Rules (From VLAN100)#
- Allow All Outbound
- Action: Pass | Protocol: any | Source: VLAN100 net | Dest: any
Right now the source is undefined so any IP is accepted which is a little insecure. In the future, I’ll probably restrict it to specific VLANs and subnets.
Installation#
Create an LXC#
To get started, I created a standard debian 13 LXC container as base system to install Wazuh and ran a few basic post-install commands:
apt update && apt upgrade -y && apt install curl sudo -yOptions:
Since this is not going to be used heavily it is okay to cut down on resources mentioned in the wazuh documentation found here.
- 4 cores
- 4096 MB (4GB) of RAM
- 25 GB storage
- Configured static IP
10.200.100.10and VLAN tag100onvmbr1
If required, you can always allocate more resources later.
Installing Wazuh#
I used the installation assistant:
curl -sO https://packages.wazuh.com/4.14/wazuh-install.sh && sudo bash ./wazuh-install.sh -aOnce the installation is complete, take a note of the temporary password, as you’ll need it to log into the dashboard.
If you forgot to take a note of it (like me) just run the following command to list all the users and their passwords:
tar -O -xvf wazuh-install-files.tar wazuh-install-files/wazuh-passwords.txtLogin with the username admin and the temporary password. Don’t forget to change the password once logged in :
The passwords tool is embedded in the Wazuh indexer under /usr/share/wazuh-indexer/plugins/opensearch-security/tools/. You can use the embedded version or download it with the following command:
curl -so wazuh-passwords-tool.sh https://packages.wazuh.com/4.14/wazuh-passwords-tool.shbash wazuh-passwords-tool.sh -u admin -p <mypassword>and of course…
Dark Theme:#
Wazuh developers have done a pretty good job at hiding this setting not going to lie. This could have been way simpler but here is a guide I found online
Wazuh Twingate Access#
In order to save my sanity and make life easier, I created a new resource and network in twingate and added a twingate connector to the wazuh container for ease of access and management.
You can configure port forwarding, even more firewall rules, static routes etc but it gets complicated really quickly.
Wazuh Agents#
Use the official documentation to add the agents. This one is specific to linux. Make sure to follow the right guide for the right OS.
